Before you begin
If you don’t already have one, create a Mailosaur account.
Make sure you know how to send email to Mailosaur first. Once you have this working, you’re ready to start testing!
1. Create an API key
Account-level API keys allow you to access all the functions described in the API reference, and have access to all the servers in your account.
To create an account-level API key, you must be an Administrator or Account Owner on the account in question.
- Go to the Settings page in the Mailosaur Dashboard.
- Go to the API Keys page.
- Click the Create a Key button.
- In the dialog that appears, enter a name for your key.
- When you are finished, click Create.
For more information, see our guide on managing API keys.
2. Fork the Mailosaur Postman Collection
Mailosaur has a public Postman Collection which you can access by clicking the button below:

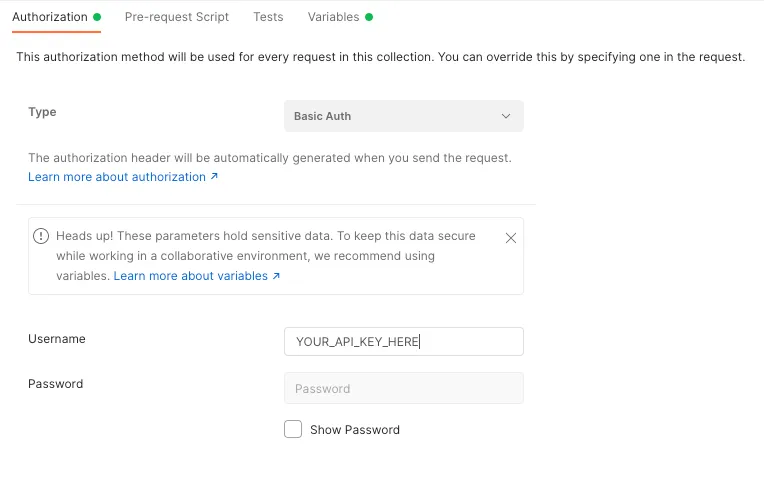
Once you have the collection loaded, simply enter your API key from step 1 above into the Authorization tab, by ensuring the Basic Auth type is selected, with your API key entered as the Username. Once this is done you’re ready to start calling the endpoints in the collection!
How to await a message using Postman
It can sometimes take a few seconds for a new email or SMS message to arrive in your inbox. This is why our official API clients automatically wait for new matches. Using the steps below, you can configure your Postman tests to 'poll' until a new message arrives or a timeout is reached.
Assuming you're running your tests as part of a Postman collection, you can do the following:
- Add a single request to your collection that calls the search endpoint.
- Edit the 'Tests' tab for that request, and add the code shown below. This code checks the API response and calls the endpoint again if no matches are found.
- Once you've saved this, you can then go to your Postman collection and run it.
Important: Remember that the 'search' endpoint only returns a message summary and does not include the body content of each message. To get this, you just need to follow this up with a call to the retrieve message endpoint using the message ID from the search response.
if (!pm.environment.has("maxWait")) {
    pm.environment.set("maxWait", 0);
}

const timeout = 10; // Max seconds to wait for
const maxWait = parseInt(pm.environment.get("maxWait"), 10);
const response = pm.response.json();
const messages = response?.items;

if ((messages && messages.length > 0) || maxWait >= timeout) {
    pm.test("match should have expected subject", function () {
        pm.expect(messages[0].subject).to.eq("My expected email subject");
    });
} else {
    // Wait 1 second to avoid rate limiting
    setTimeout(() => {}, 1000);
    pm.environment.set("maxWait", maxWait + 1);
    postman.setNextRequest(request.name);
}